How to Build AI Blog Automation with n8n: A Complete Guide
We’ve all heard that “content is king,” but let’s be honest: churning out high-quality articles consistently takes a massive amount of time. Just researching, drafting, formatting, and finally hitting publish on a single technical piece can easily eat up your entire day. But what if you could offload all that heavy lifting to your server and wake up to fully formatted drafts waiting for your review?
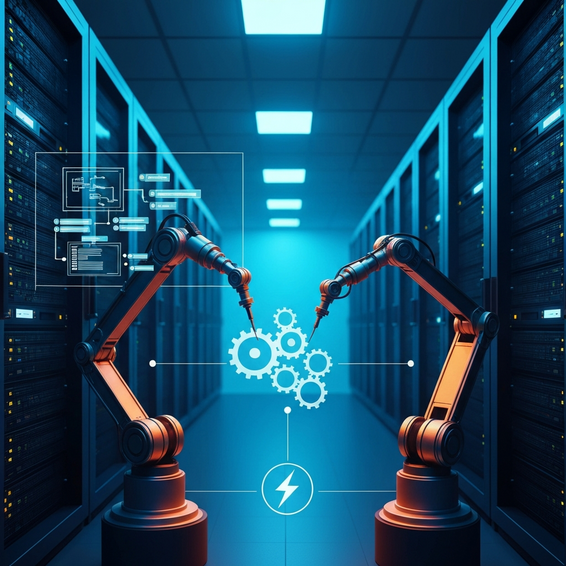
Scaling a content strategy without burning out is tough, which is exactly why learning how to build AI blog automation with n8n changes everything. When you wire up modern artificial intelligence tools directly to your content management system, you effectively build a tireless, behind-the-scenes engine that works around the clock.
In this hands-on guide, we’ll walk through exactly how to bridge the gap between the OpenAI API and WordPress using n8n. Whether you’re setting up the automation engine for the first time or tweaking advanced REST API payloads, we’ve got you covered. By the end, you’ll have the exact framework you need to reclaim your schedule and give your productivity a serious boost.
Why You Need to Know How to Build AI Blog Automation with n8n
As your blog or digital agency starts taking off, doing everything by hand quickly turns into a massive bottleneck. The real culprit isn’t necessarily a lack of time to write. Instead, it’s the constant friction of bouncing between disconnected apps. Think about it: your research tools, AI writing assistants, and CMS simply don’t talk to each other out of the box.
Under the hood, the missing piece is usually robust workflow automation. Relying on web-based tools in their native environments forces you into an exhausting, repetitive loop. You type up a prompt, sit around waiting for the response, wrestle with the formatting, log into WordPress, paste the text in, and then inevitably have to fix a bunch of broken HTML tags.
It’s a disjointed process that practically guarantees creative burnout. On top of that, all this manual copy-pasting just invites silly formatting mistakes, broken shortcodes, and forgotten SEO metadata. Sure, you could use platforms like Zapier or Make to bridge the gap, but they usually come with strict execution limits and hefty price tags for complex, multi-step AI workflows.
That’s where building a centralized AI content pipeline with an open-source tool comes to the rescue. Because n8n lets you self-host and connect directly via APIs without slapping arbitrary caps on your tasks, your data can finally flow freely. Complex machine learning models can pass content right into your CMS, completely hands-free.
Quick Fixes: Setting Up the Infrastructure Foundation
Before we jump into wiring up complex nodes and tweaking JSON payloads, we need to get your environment ready. Any reliable, smooth-running pipeline relies on having the proper access credentials dialed in for your apps.
If you’re ready to learn exactly how to build AI blog automation with n8n from the ground up, start with these core infrastructure steps:
- Spin up your n8n instance: You can keep things simple with n8n Cloud for a fully managed setup, or deploy it on your own server using Docker Compose. If you’re an IT pro looking for maximum privacy, custom node support, and unlimited executions, going the self-hosted Docker route is highly recommended.
- Grab an OpenAI API Key: Head over to the OpenAI developer platform dashboard, add some funds to your account, and generate a new secret key. You’ll need this to safely fuel your automated content generation engine.
- Set up WordPress Application Passwords: Standard WordPress admin passwords intentionally block programmatic API requests to keep your site secure. To get around this, head to your WP admin dashboard, navigate to Users > Profile, scroll down to Application Passwords, and generate a specific password just for n8n.
- Test the REST connection: Run a quick cURL POST request to your WordPress REST API endpoint (something like
/wp-json/wp/v2/posts). This ensures your web application firewall (WAF) or security caching plugins aren’t blocking external authentication attempts.
Advanced Solutions: Connecting the Final Pipeline
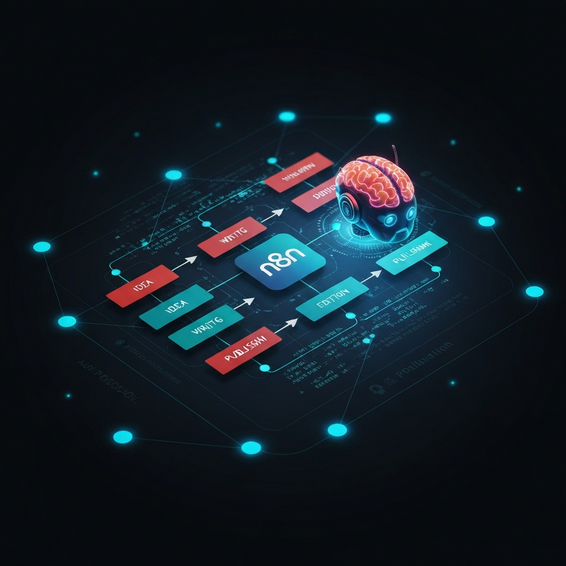
With your infrastructure rock-solid, the fun part begins: building out the actual workflow. We’ll be creating a sequence of connected n8n nodes designed to catch a trigger, generate the context, wrap the text in clean HTML, and shoot it directly over to your WordPress database.
Step 1: Setting the Core Trigger
Every good workflow needs a solid starting point. When automating a blog, you usually have two main options: a Schedule Trigger or an n8n webhook node. The Schedule Trigger is great if you want things to run on autopilot based on a cron job—say, kicking off a new post every Monday morning at 8:00 AM sharp.
On the flip side, a webhook lets you trigger your workflow on demand. By firing off a custom JSON payload from a frontend dashboard, a Notion workspace, or an Airtable script, you can pass specific target keywords right to n8n the moment you need a fresh article.
Step 2: Idea, Outline, and Context Generation
Next up, drop an OpenAI node onto your canvas. Set it up to use the Chat functionality and select a capable model like GPT-4o. Think of your very first prompt here as the brain of the whole operation. You’ll want to ask the AI to whip up an SEO-optimized blog title and a detailed, logical outline based on the keyword you just fed it via the webhook.
Why not do it all in one prompt? Splitting the generation into distinct, manageable steps drastically cuts down on the risk of AI hallucinations. It’s the best way to ensure your final document has a logical, readable flow rather than just being a massive wall of rambling text.
Step 3: Drafting the HTML Content
Once you’ve got that solid structural outline in hand, pass the data along to a second OpenAI node. Here, you’ll want to tweak the system prompt so the AI acts like a senior technical copywriter. Instruct it to write a deep, comprehensive article that sticks strictly to the outline you just created.
This is also the crucial moment to enforce your formatting rules. Explicitly tell the AI to return the final output entirely in clean HTML formatting. Remind it to use <h2> and <h3> tags for its subheadings, <ul> tags for bulleted lists, and <strong> tags whenever it needs to emphasize a point. Getting this right means the text will render flawlessly the second it lands in the WordPress Gutenberg editor.
Step 4: Pushing the Payload to the WordPress REST API
Finally, tie it all together by connecting a WordPress node (or a standard HTTP Request node set up with Basic Auth) to the very end of your workflow. Configure the resource to “Post” and the operation to “Create.” From there, just map your AI-generated title to the Post Title parameter, and slot your raw HTML string right into the Post Content field.
One major tip here: always set the status parameter to “draft.” Pushing automated content straight to “publish” is a risky game. Leaving it as a draft gives your editorial team a chance to review the piece, sprinkle in relevant internal links, and double-check that the tone sounds exactly like your brand.
Best Practices for DevOps and AI Automation
Knowing how to click the nodes together is really only half the battle. Fine-tuning your setup for long-term security and reliability is what takes a workflow from a weekend hobby project to an enterprise-grade automation system.
- Keep a human in the loop: Please don’t publish AI content blindly. Search engines still heavily favor EEAT (Experience, Expertise, Authority, Trust). By keeping posts in draft mode, you buy yourself the time to inject personal anecdotes, real-world statistics, and a unique point of view that no AI can fake.
- Set up Try/Catch error handling: External APIs are going to fail at some point—it’s just a fact of developer life. Rate limits get maxed out, and sometimes your WordPress server just times out. Take advantage of n8n’s Error Trigger node to catch these hiccups and ping a quick alert over to your DevOps Slack or Discord channel.
- Lock down your credentials: Always tuck your API keys safely inside n8n’s secure credential vault. Never hardcode your bearer tokens or app passwords straight into an HTTP Request node. If you ever decide to export your workflow JSON to share it online, any hardcoded keys go right along with it—which is a security nightmare.
- Obsess over your system prompts: Dedicate some real time to tweaking and optimizing your prompts. Tell the AI exactly how long paragraphs should be, force it to use natural transition words, and explicitly define your brand’s personality. This is the secret to avoiding that dull, robotic tone everyone associates with lazy AI writing.
Recommended Tools and HomeLab Resources
To actually pull off this automated strategy, you need the right tools running in your homelab or cloud environment. Here’s a curated stack of resources that will help your pipeline sing:
- n8n Workflow Automation: This is the beating heart of your entire pipeline. Be sure to browse the official n8n documentation if you want to dive deep into advanced Docker Compose deployments.
- Hetzner or DigitalOcean: Going the self-hosted route? Spinning up a Linux instance on an affordable VPS is usually the best bet for developers. You can start your cloud journey with DigitalOcean today.
- OpenAI API: The linguistic brains of the operation. Their pay-as-you-go pricing model makes it surprisingly affordable, even if you’re running a massive content operation.
- RankMath SEO Plugin: Once your fresh draft is sitting in your WordPress database, fire up this plugin during your final review. It’s perfect for making sure your meta titles, descriptions, and keyword densities are dialed in for maximum search visibility.
Frequently Asked Questions
Is n8n completely free to use for automation?
If you self-host n8n, it operates under a fair-code license. That generally makes it free for personal, internal, and small-scale business use—meaning you only foot the bill for your server costs. However, if you want a managed SaaS experience where you don’t have to touch a Linux terminal, you’ll need to grab one of their monthly cloud subscriptions.
Can Google detect and penalize AI-generated content?
Google has been pretty clear in their Search Central guidelines: they don’t penalize content just because an AI wrote it. What they do penalize is low-effort, spammy content that offers zero value to the reader. That’s why reviewing your automated drafts and injecting your own unique insights is so important for keeping those EEAT quality scores high.
Do I need to be a software developer to build this workflow?
Not at all! While having an IT, DevOps, or computer science background definitely makes troubleshooting easier, n8n relies on a highly visual, drag-and-drop interface. As long as you can wrap your head around basic web concepts like JSON structures, API keys, HTTP methods, and webhooks, you’ll be able to build this out just fine.
Conclusion
Scaling up a technical blog shouldn’t mean sacrificing your weekends or grinding out 80-hour weeks. Once you grasp how to build AI blog automation with n8n, you can literally transform a painfully tedious manual process into a smooth, hands-off content machine. It’s a modern approach that lets you win back your most valuable asset—your time—without ever missing a strict publishing deadline.
If you want to guarantee success, start small. Build a basic workflow that just pushes a simple text draft into your WordPress backend. As you get more comfortable playing around in n8n’s powerful ecosystem, you can start layering in the complex stuff. Before you know it, you’ll be adding dynamic DALL-E image generation, automated social sharing, and robust SEO metadata tweaks. Automate the boring technical tasks so you can finally get back to what really matters: your creative strategy and growing your business.