How to Automate WordPress Using n8n: The Complete Technical Guide
Managing a dynamic website is no small feat, and you’ve probably noticed how quickly manual tasks can eat into your day. Whether you’re publishing fresh content, wrangling user data, syncing ecommerce orders, or keeping inventory up to date, administrative overhead is an ongoing struggle for both developers and site owners. Once your platform starts to grow, doing all of this by hand just isn’t scalable—not to mention the high risk of human error it brings.
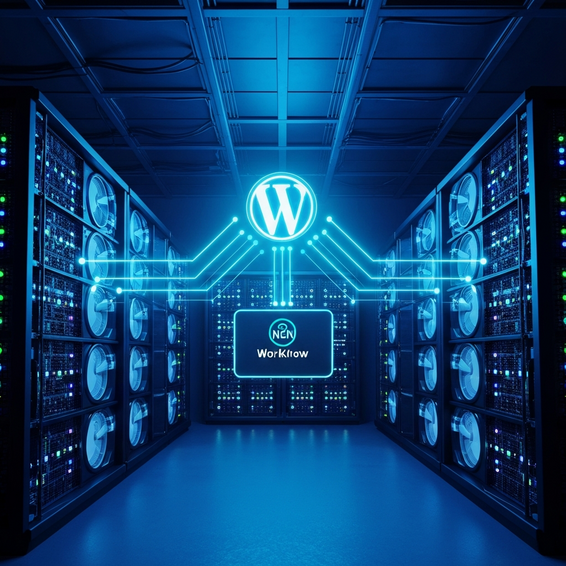
That’s where technical workflow orchestration steps in to save the day. Figuring out exactly how to automate wordpress using n8n completely changes the game. By tapping into this powerful, fair-code automation tool, you can seamlessly connect your site to thousands of external services, APIs, and databases. The best part? You can pull this off without having to write complex, custom integration plugins from scratch.
Throughout this comprehensive technical guide, we’re going to break down the architecture behind integrating WordPress with n8n. We’ll walk through everything from basic API configurations to advanced, DevOps-level database manipulation, giving you all the tools you need to build robust and scalable workflows.
Understanding How to Automate WordPress Using n8n
Before we jump straight into the setup, let’s take a moment to look at the technical limitations of a standard WordPress environment. Originally built as a monolithic blogging platform, WordPress wasn’t designed to act as a headless CMS or an event-driven architecture. Out of the box, it simply doesn’t feature native workflow automation.
To get around this, site administrators have historically relied on heavy, bloated plugins to handle automation internally. On top of that, WordPress depends on WP-Cron for its scheduled tasks. Since WP-Cron only fires when someone actually visits a page on your site, it’s notoriously unreliable for precise, time-sensitive actions. Add in the fact that running heavy logic directly on your web server eats up your PHP worker limits, and you’re looking at inevitable performance bottlenecks or frustrating 504 Gateway Timeout errors.
Because of these hurdles, using external tools is a far superior approach. When you offload these demanding tasks to n8n—particularly via a self-hosted Docker instance—you effectively separate your automation logic from your core application. Doing this protects your server’s compute resources. As a result, your WordPress installation stays lightning-fast, leaving n8n to handle all the heavy lifting quietly in the background.
Quick Fixes / Basic Solutions
If you’re completely new to the world of workflow automation, kicking things off with the native WordPress REST API alongside n8n’s built-in nodes is your safest bet. Let’s walk through the actionable steps you need to establish a rock-solid, secure connection between both systems.
Steps to Connect n8n and WordPress
- Enable the REST API: First, check that your WordPress permalinks are set to anything other than the default “Plain” setting. This simple tweak natively activates the
/wp-json/wp/v2/API endpoints. - Create an Application Password: Whatever you do, don’t use your primary admin password here. Instead, head over to Users > Profile in your WordPress dashboard, scroll down to the Application Passwords section, and generate a fresh, secure token.
- Configure n8n Credentials: Inside your n8n workspace, go to the Credentials menu. Search for the WordPress API, then enter your admin username right alongside the Application Password you just created.
- Add the WordPress Node: Now, drag and drop the native WordPress node directly onto your n8n canvas. Set it up to perform a specific action, like fetching user data or creating a brand-new post.
- Execute a Test Run: Finally, trigger the node manually. This tests the authentication handshake and confirms that your JSON payload is returning exactly as expected.
With this foundational setup in place, you gain the ability to automate content publishing, sync up user profiles with external CRMs, and handle media uploads—all without writing a single line of custom PHP code.
Advanced Solutions for IT & DevOps
Of course, if you’re part of a technical team managing an enterprise-level site, basic polling via the REST API probably won’t cut it. Handling massive amounts of data requires advanced integrations and optimized architectures designed to keep latency and database load to an absolute minimum.
Event-Driven Webhooks
Rather than forcing n8n to constantly poll your site to check for new data, a much smarter approach is configuring outbound webhooks. By taking advantage of the wp_remote_post() function tied to specific WordPress hooks (like save_post or woocommerce_order_status_completed), WordPress can push a JSON payload directly to an n8n Webhook Node the very millisecond an event happens. Shifting to this event-driven model works wonders for drastically reducing your server load.
Direct Database Manipulation
Imagine needing to update 50,000 WooCommerce products or migrate a massive dataset. Trying to push all that through the REST API is a guaranteed recipe for rate limits and HTTP timeouts. Instead, DevOps engineers can bypass the API entirely by using the n8n MySQL or MariaDB node to connect straight to the WordPress database. From there, you can execute raw SQL queries to update tables like wp_postmeta and wp_options directly. Just a quick heads-up: remember to clear your object caching (such as Redis or Memcached) after any direct database edits so those changes actually show up on the frontend.
JWT Authentication Integration
Application Passwords are certainly convenient, but highly secure environments should really be looking at JSON Web Tokens (JWT). By pairing a solid JWT plugin in WordPress with the HTTP Request node over in n8n, you can generate encrypted, short-lived access tokens. It’s an excellent way to prevent credential hijacking while meeting strict enterprise compliance standards.
Best Practices for Automation
Putting together a clever automation workflow is really only half the battle; keeping it stable over time is just as crucial. To make sure everything runs smoothly, be sure to follow these optimization and security best practices.
- Implement IP Whitelisting: Assuming your self-hosted n8n setup uses a static IP address, you should configure your WordPress firewall (like Cloudflare WAF or local iptables) to automatically drop API requests that don’t come directly from your n8n server.
- Utilize Batch Processing: Whenever you’re querying massive arrays of data, lean on n8n’s Item Lists and Split In Batches nodes. Breaking data down into manageable chunks of 50 or 100 goes a long way toward preventing memory exhaustion limits on your web server.
- Disable Virtual WP-Cron: Go ahead and add
define('DISABLE_WP_CRON', true);to yourwp-config.phpfile. After doing that, set up an n8n Cron trigger node to ping yourwp-cron.phpfile every 5 minutes. This guarantees your background tasks will execute predictably, completely independent of your actual site traffic. - Robust Error Handling: Make it a habit to attach Error Trigger nodes throughout your workflows. If an API endpoint suddenly fails, n8n can instantly alert your DevOps team via Slack or Discord, providing the exact error payload for quick troubleshooting.
Recommended Tools & Resources
If you truly want to maximize the potential of your automation stack, consider weaving these essential tools into your current infrastructure:
- n8n Self-Hosted (Docker): Hosting n8n yourself on a VPS or HomeLab eliminates pesky execution limits. Even better, it ensures your sensitive data never has to leave your private network.
- WP Webhooks Plugin: Don’t feel like writing custom PHP actions? No problem. This robust plugin offers a highly intuitive, point-and-click interface for creating complex outbound webhooks right from the WordPress dashboard.
- Advanced Custom Fields (ACF): This plugin makes it incredibly easy to expose custom meta fields to the REST API. It allows n8n to seamlessly read and write complex data structures without forcing you to write manual SQL queries.
- Redis Object Cache: If you’re automating heavy, frequent updates to WordPress, Redis is a lifesaver. It dramatically reduces database strain by storing repetitive queries locally in memory.
Frequently Asked Questions
Is n8n better than Zapier for WordPress?
For IT professionals and technical users, the answer is a resounding yes. Because n8n allows you to self-host the software, you completely bypass the strict execution limits and steep pricing tiers associated with traditional SaaS platforms. Beyond the cost savings, it offers vastly superior data privacy—a massive advantage if you’re navigating GDPR or HIPAA compliance.
Can n8n trigger workflows from WooCommerce events?
Absolutely. WooCommerce allows you to easily configure native webhooks that push rich JSON payloads directly to an n8n Webhook node. Whether a checkout is just completed or a payment status suddenly changes, you can instantly transmit order details, customer information, and specific line items the exact moment the event occurs.
Will automating WordPress slow down my site performance?
Not at all—in fact, utilizing external automation will actually boost your site’s performance. When you offload heavy tasks like complex data processing, PDF generation, or third-party API syncing to n8n, your WordPress server is freed up. This lets it dedicate its CPU exclusively to its most important job: serving lightning-fast web pages to your frontend visitors.
How do I secure my n8n to WordPress connection?
Your first step should always be enforcing HTTPS across both servers. From there, make sure you’re using Application Passwords or JWT tokens for authentication, and strictly limit WordPress API access to your n8n server’s IP address. Finally, be incredibly careful never to expose your administrative credentials in plain text anywhere within your node configurations.
Conclusion
Mastering how to automate wordpress using n8n is one of the best ways to unlock massive scalability for your digital infrastructure. By lifting heavy administrative workloads off your primary web server and moving them onto a dedicated orchestration pipeline, you’re guaranteeing tighter security, noticeably better frontend performance, and a much more resilient application layer.
If you’re feeling overwhelmed, just start small. Establish a few basic API connections for simple, repetitive tasks like content publishing. As you get more comfortable with the platform, you can slowly graduate to building out advanced, event-driven systems powered by custom webhooks and direct database manipulation. Embrace the power of automation today—it’s truly the greatest gift of productivity you can give your engineering team.