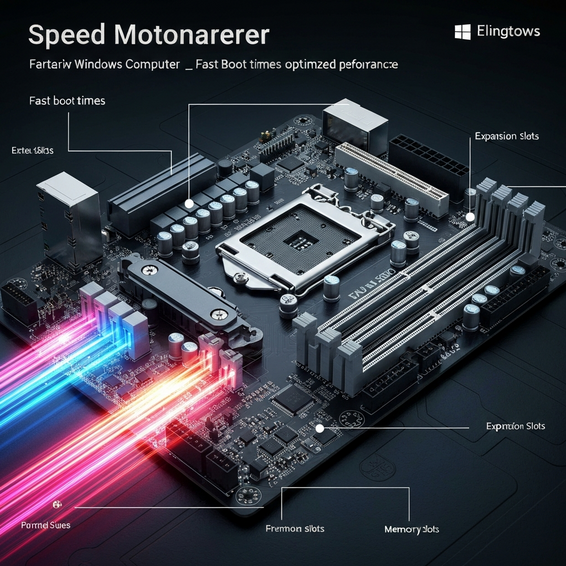
How to Boost PC Performance: Windows Optimization Guide
Is your computer starting to drag its feet the moment you throw a heavy workload its way? Whether you’re compiling code, spinning up local Docker containers, or juggling multiple remote server connections, dealing with a sluggish machine is a massive drain on productivity. If you’re currently looking into how to boost pc performance windows environments natively, you already know that a simple reboot isn’t going to cut it anymore.
The reality is that over time, operating systems naturally get bogged down. Background processes pile up, temporary files multiply, and registry bloat quietly eats away at your system’s responsiveness. In this guide, we’re going to tackle the problem head-on, covering everything from easy, five-minute fixes to advanced, developer-level system tweaks.
So, whether your goal is to speed up an aging Windows 10 machine or optimize Windows 11 for absolute peak performance, you’ve landed in the right place. Let’s dive right into the technical steps you need to take to reclaim your computer’s speed and reliability.
Understanding How to Boost PC Performance Windows Edition
Before jumping straight into the tweaks, it helps to understand exactly why operating systems seem to lose their snap over time. People often call this gradual slowdown “software rot,” and it’s usually the result of a few different technical issues compounding on top of each other.
For starters, poorly optimized third-party apps are notorious for leaving background services running 24/7. These hidden tasks quietly siphon away CPU power that should be going toward your actual work and critical system operations. Plus, practically every program you install tacks on new registry entries, scheduled tasks, and startup routines that happily eat up your precious RAM.
Another major factor is the heavy telemetry and diagnostic data collection baked directly into modern versions of Windows. Because these background processes are constantly “phoning home” to Microsoft servers, they chew through both your network bandwidth and disk I/O. When too many services try writing to your storage drive all at once, you inevitably end up with system stuttering and annoying input lag.
Finally, we can’t ignore thermal throttling—an incredibly common yet frequently overlooked culprit. When your CPU or GPU hits critical temperatures, the system’s firmware steps in and automatically downclocks the hardware to prevent physical damage. If your cooling setup isn’t doing its job, no amount of clever software tweaking is going to bring back your lost speed.
Quick Fixes and Basic Solutions
If you’re looking for quick wins with immediate results, these basic fixes are incredibly effective. They are all about trimming down system overhead and freeing up resources, all without forcing you to dig into complicated configuration menus.
1. Disable Startup Apps
Disabling unnecessary startup apps is arguably the single most effective way to shave seconds off your boot time. When a dozen different programs try to launch the moment you log in, they create a massive bottleneck, completely overwhelming your disk’s read speeds and memory allocation.
Fixing this is incredibly straightforward: just right-click your taskbar and pull up the Task Manager. Head over to the “Startup” tab, where you’ll see a complete list of everything trying to boot alongside Windows. Sort that list by “Startup impact,” and go ahead and disable anything you don’t need right away—especially heavy offenders like game launchers or auto-syncing cloud tools.
2. Clean Up PC Storage and Temp Files
If your main local drive is constantly hovering near maximum capacity, Windows won’t be able to effectively use its pagefile, which almost always results in severe system slowdowns. Making it a habit to regularly clean up PC storage is vital if you want your solid-state drive (SSD) running at peak efficiency.
To automate this, press the Windows key, type “Storage Settings,” and toggle on the Storage Sense feature. This handy built-in utility works behind the scenes to automatically clear out temporary files, empty your recycle bin, and delete massive, leftover Windows update caches. If you prefer taking a more manual approach, you can always run the classic “Disk Cleanup” tool as an administrator to wipe away more stubborn system files.
3. Enable the High-Performance Power Plan
Out of the box, Windows defaults to a “Balanced” power plan that actively scales down your CPU frequency to save on energy costs. But if you’re plugged into a wall on a desktop workstation, this kind of artificial throttling is usually entirely unnecessary.
To lift the brakes, open up the Control Panel and navigate over to Power Options. Selecting the “High Performance” plan will ensure your CPU is allowed to operate at its maximum base clock when needed. If you want to take it a step further and unlock the hidden “Ultimate Performance” tier, simply open an elevated Command Prompt and punch in powercfg -duplicatescheme e9a42b02-d5df-448d-aa00-03f14749eb61.
Advanced Solutions for Power Users
Basic tweaks are great, but for IT professionals and developers running intense, complex DevOps workflows, they often aren’t enough. To squeeze every last drop of performance out of our hardware, we really need to dig down and modify some low-level system configurations.
1. Disable Windows Telemetry via Group Policy
As mentioned earlier, Microsoft’s telemetry services have a habit of silently chewing through disk I/O and network bandwidth right under your nose. If you happen to be running either Windows 10 Pro or Windows 11 Pro, you can actually shut these diagnostics off completely at the policy level, ensuring your resources remain dedicated solely to the apps you actually care about.
To do this, hit Win + R and type in gpedit.msc to fire up the Local Group Policy Editor. From there, drill down into Computer Configuration > Administrative Templates > Windows Components > Data Collection and Preview Builds. Look for the “Allow Telemetry” policy, set it to Disabled, and apply the changes. You’ll likely notice a significant drop in background noise almost immediately.
2. Optimize Virtual Memory and Pagefile
When virtual memory isn’t optimized correctly, you’re looking at a recipe for system crashes and annoying sluggishness—especially if you’re hosting heavy workloads like local virtual machines. Windows tries to help by dynamically managing your pagefile size, but letting the OS constantly resize this file often leads to severe fragmentation over time.
A better approach is setting a static pagefile. Search for “Advanced system settings” in your Start menu, and under the Performance block, click Settings. Navigate over to the Advanced tab, click Change under Virtual memory, and uncheck the automatic management box. From there, you can dial in a Custom size tailored specifically to your system’s total physical RAM.
3. Adjust BIOS/UEFI Settings
At the end of the day, your operating system is bound by the limits of your physical hardware. It’s surprisingly common to see users who have recently built a PC or upgraded their RAM running their components at the default, incredibly slow JEDEC specifications without even realizing it.
To fix this, simply reboot your machine and tap your way into the BIOS/UEFI settings menu. You’ll want to hunt down the XMP (Extreme Memory Profile) or EXPO settings and turn them on. Enabling this single feature forces your RAM to run at its true advertised speed, which does wonders for system latency and can even boost your FPS in graphically demanding applications.
Best Practices for Ongoing Optimization
Keeping your system feeling snappy isn’t just a one-and-done deal; it requires a bit of ongoing diligence and regular maintenance. One of the best long-term habits you can build is minimizing your security software footprint. While having an antivirus is undeniably essential, trying to run multiple heavy security suites at the same time is a surefire way to absolutely cripple your disk performance.
Honestly, for optimal performance, you are usually best off sticking to the built-in Windows Defender, paired with good old-fashioned safe browsing habits. Aside from that, make sure you’re keeping your system drivers consistently updated to ward off nasty memory leaks. Outdated chipset or graphics drivers are infamous for causing invisible hardware conflicts that quietly degrade your PC’s speed.
Rather than leaning entirely on Windows Update to handle this, try downloading your motherboard drivers directly from the manufacturer’s official website. This is especially true if you are managing a home server environment, where locking down stable, official driver releases is absolutely critical to maintaining 24/7 uptime.
Recommended Tools and Resources
If you want to streamline this entire optimization process, it’s worth adding a few specialized diagnostic and cleaning tools to your utility belt. These programs offer a level of granular control that goes way beyond what standard Windows guides typically cover.
- Sysinternals Suite: Provided straight from Microsoft, this amazing suite of utilities features heavyweight tools like Autoruns. It hands you absolute, uncompromising control over every single script, service, and application that dares to launch with Windows.
- BleachBit: Think of this as the privacy-respecting, open-source alternative to CCleaner. It doesn’t come bundled with annoying bloatware, and it absolutely excels at deep system cleaning to reclaim previously wasted disk space.
- Hardware Upgrades: Sometimes software tweaks just aren’t enough. If your PC is still choking on modern workloads, it might just be time to bite the bullet and physically upgrade your hardware. Moving your OS to a lightning-fast NVMe M.2 SSD (you can browse some of the top-rated NVMe drives on Amazon) will easily give you the most dramatic performance bump imaginable.
Frequently Asked Questions
Will adding more RAM speed up my PC?
Yes, but primarily if your system is already maxing out at 80% or more of its current memory capacity during daily use. Tossing more RAM into your rig stops Windows from having to aggressively lean on that much slower, disk-based pagefile we mentioned earlier, which in turn drastically improves your multitasking performance.
Does debloating Windows improve performance?
Absolutely. Going in and ripping out pre-installed bloatware, while simultaneously turning off useless background services, frees up a ton of valuable CPU cycles. The end result? Faster boot times and a desktop experience that feels instantly more responsive.
Is it safe to change CPU priority in Windows?
Tweaking CPU priority via the Task Manager is generally perfectly safe, provided you are only doing it for temporary application sessions. That said, never set an application’s priority to “Realtime,” as this can completely lock up your system by starving the core Windows processes of power. Stick to “High” priority for your most demanding tasks to play it safe.
Conclusion: Mastering How to Boost PC Performance Windows Edition
At the end of the day, knowing exactly how to boost pc performance windows environments naturally offer is an absolutely vital skill for any modern power user. By simply understanding what actually causes software bloat and implementing quick fixes like disabling startup apps, you can easily reclaim your lost speed. And once you’re comfortable diving a bit deeper into advanced registry edits and Group Policy tweaks, you’ll be able to truly maximize your system’s raw potential.
Just remember that keeping up with consistent maintenance is every bit as crucial as the initial optimization process itself. Make it a habit to keep your drivers updated, regularly purge those annoying temporary files, and keep a close eye on your system thermals. Put these technical strategies into practice today, and you’ll be well on your way to enjoying a vastly faster, far more reliable computing experience.